Pages

Monday, 2 April 2012

Bak Kut Teh


Bak kut the is a Chinese soup that is popular in Malaysia, Singapore, Taiwan and Riau- an Indonesian island. The one intriguing factor that makes people stay at Klang is this dish. The food lovers scrutinize each and every ingredient of this dish especially the herbal taste in the soup.
Bak kut the is a soup based dish comprising of different cut pork meats that are simmered in a broth of spices and herbs. In addition some ingredients like offal, varieties of mushrooms, choysum and fried tofu can be added. There are some Chinese herbs that are added to the dish to give it more flavors. There is a fragrant soup that is prepared with medicinal herbs and makes this dish worth eating. It is usually served with steamed rice and escorted by a cup of Chinese tea.
The origin of the dish has a historical background. During 19th century, Chinese who started to live in Malaysia managed to follow the recipes of their ancestors with some additional ingredients and thus set up their life approach. Bak Kut Teh becomes the signature dish of Chinese in these regions. Mostly Chinese in the Southeast Asia employed as labors and a healthy breakfast t is generally demanded because of the hard working nature of the job. That's how the dish was conceived. The exceptional taste as well as the medicinal herbs made it very popular. The recipe was passed to afterward generation and they further add in the taste, that is how it is appreciated by Malaysians as well as by the Singaporeans.
Most of the people are not familiar with the fact that there are two versions of Bak Kut Teh. One version if from Klang and the second one is from KL. The former one is served with thick soup while KL is light in taste. This dish is eaten in breakfast usually and is one of the traditional dishes served in Malaysia. Chinese donut is also served with this dish as a side dish. The taste of this dish is very unique like a combination of tea leaves and flavored soya sauce. Mostly you experience a sweet and sourly taste. The rich aroma and delicious serving makes it worth eating. You can have it either with rice or only with soup.
The best places from where it is selling in its best way are in the local streets. People also prefer it because of its healthy contents; the Chinese medicinal herbs are liked by most of the diet conscious persons as they have valuable health benefits. While visiting Malaysia, you should make it a point to taste Bak Kut Teh. 

Singapore Noodle Salad


Singapore's cuisine is influenced by Chinese, Indian, Indonesian, Malay, and western cuisines. There are also traces of Middle Eastern and Thai recipes in there. The cuisine of Singapore is probably most similar to Malaysian food because the two countries have deep historic ties. A lot of dishes are shared between the two nations, although preparation methods differ a bit.
Singapore is quite a small country and the population is large, which means that most food and produce is imported since there is not much space for farmland or agriculture. There are however a few farmers who produce poultry, fish, fruit and leafy vegetables. The country is well connected with sea transport and air routes so importing many kinds of food is not a problem.
One of the most famous Singaporean recipes has to be Singapore noodles and if you fancy making a salad instead of a hot dish, the following recipe is traditionally Singaporean and really flavorful. The various vegetables add color and flavor and the sesame seeds, garlic, chili sauce, chives, sherry and more add plenty of flavor. You can serve this in small portions as an appetizer or larger ones as a side dish to go with a marinated steak recipe or something similar.
Before you baulk at the lengthy ingredients list, rest assured that this is a fantastic tasting and impressive recipe and it is well worth making. Use spaghetti-style Chinese noodles for this dish.
What you will need:
  • 1/2 cup peanut butter
  • 1 head broccoli, in 1 inch florets
  • 1/4 cup sesame seeds
  • 1/2 cup chicken stock
  • 2 tablespoons vegetable oil
  • 1/2 lb dried noodles
  • 2 teaspoons white sugar
  • 1/4 cup red wine vinegar
  • 1 lb asparagus, in diagonal 1 inch pieces
  • 1 tablespoon dry sherry
  • 2 tablespoons dark soy sauce
  • 1/4 cup minced scallions
  • 1 red bell pepper, in thin slices
  • 2 tablespoons minced chives
  • 1 cup bean sprouts
  • 2 tablespoons finely minced ginger
  • 1 minced clove garlic
  • 1 tablespoon sesame oil
  • 1 cup thinly sliced shiitake or button mushrooms
  • 1 1/2 teaspoons Chinese chili sauce
How to make it:
Toast the sesame seeds in a dry skillet until they are golden brown and fragrant; this will take about a minute. Cook the noodles in boiling salted water for a few minutes until they are tender. Separate them with a fork and drain them. Toss them with the vegetable oil.
Boil the broccoli for a few minutes until it is al dente, and then chill it in a bowl of ice water until cold. Drain it. Cook the asparagus in boiling water for a minute or two, then chill it in the ice water and drain it.
Bring the stock to a boil over a medium high heat, then take it off the heat and stir in the vinegar, sesame oil, peanut butter, soy sauce, sugar, sherry, garlic, toasted sesame seeds, scallions, ginger and chili sauce. Toss the noodles with the vegetables. Add the dressing and toss well. Chill for half an hour. Sprinkle the chives on top and serve. 

Traditional South African Recipe - Potjiekos


Each country has its own traditional recipes, and more than likely the ingredients are pertinent to the food available in that particular country. The fresh ingredients would probably be the fruit or vegetables grown in that country and are easily available through the seasons of the year. This South African recipe, 'Potjiekos', that uses all of the local ingredients to South Africa, is traditionally an outdoor meal, often prepared in a heavy cast iron pot over a fire. The name 'potjiekos' means 'potjie' which is pot and 'kos' means food. Food in a pot. The end result is similar to the more commonly known beef or lamb stew. But it seems that the flavour is enhanced because of the pot. Somehow it seems to keep all of the flavours and is quite different to the conventional way of preparing a stew.
The pot is made from cast iron and is very heavy. It's belly pot design seems to prevent the moisture from boiling out. It has a swing handle that drops down at the side of the pot and is design to take the heat of the open fire with it simmering away for two or three hours. The belly pot often has three cast iron legs where one can simply stand the pot over the fire, or you may hang the pot over the fire by the handle. Either way you have to use an oven glove or tea towel to lift the handle or the lid as they both become exceptionally hot. The Potjie' has to be stirred, preferable with a wooden spoon every so often to prevent the mixture from burning at the bottom. This should be done with a wooden spoon so as not to break up the dumplings.
The recipe calls for beef or lamb, onions, carrots, some peas,which is optional,seasoning, and dumplings, made from a regular dumpling recipe of flour and suet. The onions and meat are fried until brown. Finally add the rest of the ingredients listed in the recipe, add enough water to just cover the meat and vegetables and simmer for a couple of hours. 

Malva Pudding


Almost every restaurant in Cape Town has Malva Pudding on its dessert menu. It is one of those ubiquitous dishes that one has to side-step diplomatically, as a tour manager organising menus for a week of dinners for clients on walking holidays. If you're not careful you could end up with a gastronomic tour of Cape Town's Malva Puddings! That's not to say that it is not a good dessert choice. It is rich, delicious and indulgent and has to be tasted at least once on a gourmet tour of Cape Town. Along with many other traditional South African dishes it gives a nod to the Netherlands for its origins. Essentially a rather homely baked cakey pudding, its restaurant version soaks itself in a rich, creamy sauce to take on a mantle of decadence, while elegant versions serve themselves up with a few poached apricots alongside too.
No-one seems to know where the name Malva pudding came from - suggestions range from a traditional accompaniment of Malvasia wine, a heavy dessert wine, to a woman named Malva creating it back in the mists of time.
I tried out my sister-in-law's recipe to make a dessert to follow our Sunday lunch of roast chicken and roast potatoes. Hers is a home version rather than restaurant one and gives details for the cake without drenching it in the creamy sauce. It produces a comforting cross-between steamed pudding and cake, with a tantalising hint of the apricot jam that flavours it and a pleasing, almost caramelly overtone. It is served warm with custard and cream alongside. Leaving out the stage of drenching it with the sauce makes it a lot less rich and calorific, but does mean that you can eat a lot more of it!
Malva Pudding Recipe
Serves 6-8
1 heaped tablespoon butter
3 heaped tablespoons apricot jam
1 egg
1 cup flour
1 teaspoon bicarbonate of soda
½ cup sugar
½ cup milk
Cream together the butter and sugar. Add the beaten egg and jam and beat together. Add the dry ingredients and milk alternately and stir into the mixture. Pour the batter into a greased round dish approx 21cm / 8 inches. Cover either with a lid or tinfoil and bake at 180C / 375F for 30 minutes until the top is browned and a skewer comes out clean. Serve warm with custard and cream.
If you would like to try the rich and more traditional version of Malva Pudding, and I think it should be done once in a while, here is a recipe for the sauce to drench it in as soon as it leaves the oven.
Sauce
1 cup cream
4oz / 100g butter
½ cup sugar
60 ml hot water
Warm together the ingredients until the butter has melted and the sugar dissolved and pour over the pudding as it comes out of the oven. You can prick holes in the top to help the sauce soak in.
With the sauce incorporated into the Malva Pudding you hardly need anything else to accompany it, the cream being already inside! Just for appearances' sake though you might like to serve it with a conservative dollop of vanilla ice cream, or a few poached apricots and a drizzle of cream. The other compromise is to reserve some of the sauce to serve alongside the pudding rather than letting the whole amount soak in. 

Special Sangria Recipe From Spain


Spain is a very beautiful place and its towns and cities are very popular places for people to go on holiday; one main thing that people look forward to when they visit is the authentic Spanish food and the famous Sangria. One of the best things about Sangria drink is that there are various fruit mixtures that you can choose from when you order it from a restaurant and it a delicious non-alcoholic version can be mixed up for children to enjoy.
You can make your own Sangria drink while you are at home and become an expert at making the best Sangria drinks that anyone has ever tried. There are definitely no secrets to this recipe and many people enjoy being able to make it quickly and in large quantities for parties. You can pretty much drink Sangria whenever you feel like it, but it is really a summer drink which is when you will enjoy it the most. Some restaurants in Spain will only serve Sangria drinks during the summer time while other restaurants serve the drink all year round. Depending on where you go, you can buy Sangria with a mild amount of alcohol in them or with heavier amounts. Restaurants will normally serve mild Sangrias while bars will serve Sangrias with heavy alcohol and flavoured liquors.
Now that you know a little about the Sangria drink from Spain, it is time to make your own. You will first want to make sure that you have the right kind of pitcher to put your Sangria drink in. It's best to use either a glass pitcher or a stainless steel pitcher so that your drink will stay nice and cold and you can make a decent amount.
As for the ingredients, you will need red wine, orange liquor, orange juice, and then a variety of fruits and berries. Make sure that you choose a selection of in-season fruits and include citrus fruits to give your Sangria a refreshing edge. Blend your mixture together to taste and then add either some sparkling water or some lemonade to add a bit of fizz! To get the best taste you should let the mixture sit in your fridge overnight or at least for a few hours, this way it will not only be perfectly chilled but the flavours will have had a chance to infuse and develop, making it a delicious drink for all.

Banana Bread Recipe


Banana has a great nutritional significance. This fruit provides energy in our body because of its main composition which is water and carbohydrates. Bananas have three natural sugars such as sucrose, glucose and fructose along with fiber which was proven to give instant and substantial boost of energy. Notably bananas are rich in minerals like phosphorous which is essential for bone development and calcium.
Banana is the handiest fruit and is almost available the whole year round. Commonly the banana's fiber content makes it a superior support in restoring proper bowel movement among children and adults. Mother can always have bananas incorporated in their children's diet. A delectable banana bread recipe is no less appealing to children than having it serve naturally plain. Your kids will surely love a tasty moist banana bread recipe and beg you to make more!
One secret to have a flavorful and moist banana bread recipe is to use an overripe one and by mashing it well. You can keep your excess banana in a paper bag and have it store in your refrigerator for another enjoyable banana bread recipe in the future.
The following banana bread recipe had passed the toughest critics, chef, and mothers and from our grandmothers who love it, and surely you'll love it too.
Ingredients:
3 overripe bananas 1 teaspoon baking soda
1 cup granulated sugar 2 cups all purpose flour
1 tablespoon milk 1 teaspoon salt
8 tablespoons (1 stick) unsalted butter, room temperature)
2 large eggs 1 teaspoon ground cinnamon
Cooking procedures:
1. Preheat oven to 350 degrees Fahrenheit (175 degrees Celsius). Lightly grease 9x5 inch loaf pan.
2. In a large bowl, mix flour, baking soda and salt. In a separate bowl, cream the sugar and butter until light and fluffy.
3. Stir the eggs in and mashed bananas until well blended. Stir the banana mixture with flour mixture just enough to moisten it.
4. Pour butter batter into loaf pan.
5. Finally bake in preheated oven for 60 to 65 minutes; or until toothpick inserted in the center comes out clean. Let the bread cool in a pan for 10 minutes, then turn out onto a wire rack, let it completely cool before slicing.
Coming up with a good moist banana bread recipe is like finding any good recipe. You can either do it yourself or you can have it from friends who made and loved it. 

Catalonia Sandwich Recipe


Barcelona is the major city located in the ever expanding region known as Catalonia. Catalonia is the first tourist destination of Spain. The main tourist destinations of Catalonia are the city of Barcelona, the beaches of the Costa Brava at Girona and the Costa Daurada at Tarragona. In the Pyrenees there are 10 ski resorts: Baqueira Beret, the Molina, Espot Ski, the Masella, Port Aine, Vall de Nuria, Boí Taull, Port of the Comte, Flat of Peguera, Tavascan and Vallter 2000. Drop into any cafe and you will be able to order this outstanding sandwich.
Catalan Spanish-Style Tuna Sandwich
Makes 2 Sandwiches
1 can tuna fish (6 ounces), well drained
2 tablespoons finely chopped onion
2 tablespoons coarsely chopped red bell pepper
1 1/2 tablespoons aioli or mayonnaise
1 tablespoon cooked green peas (optional)
1 1/2 tablespoons chopped green olives
1/4 teaspoon black pepper
French baguette bread or roll
1-2 artichoke hearts (canned or bottled), drained and sliced
1 boiled egg, sliced into 1/4-inch rounds
Ingredients for aioli:
3-4 cloves garlic, peeled
1/4 teaspoon salt
1 egg yolk
1 1/2 teaspoon lemon juice
3 tablespoons olive oil
For the aioli:
1. Smash garlic with a mortar and pestle (or against a cutting board using the back of a knife, or heavy knife blade) to make a coarse paste.
2. Add the salt and continue to mash the mixture until it is a smooth paste. Transfer the paste to a small bowl and add the egg yolk. Whisk rapidly by hand for 30 or more seconds, until the mixture is smooth and slightly frothy.
3. Slowly drizzle in the lemon juice, then the olive oil, while whisking. Continue whisking for another minute, or until it becomes a creamy sauce.
Store in a covered container and refrigerate until ready to use. The aioli will keep for several days. Makes about 1/2 cup.
For the sandwich:
1. Combine the tuna, onion, red bell pepper, aioli or mayonnaise, green peas, green olives, and black pepper and mix well.
2. Split the baguette or rolls in half and stuff with the mixture.
3. Top the tuna mixture with the artichoke heart slices and egg rounds. 

Spanish Chorizo and Cod Stew Recipe


Spanish chorizo partners perfectly with white fish, the smokiness from the pimento infused sausage adds depth to the fish, turning it into a hearty satisfying meal that works incredibly well in the warmer summer months or colder winter season.
This stew has a base of fresh ripe tomatoes, but you are able to use really good tinned tomatoes instead. This stew could easily be transformed into soup by including twice as much the quantity of stock, making sure that there is a good deal of liquid with scrumptious pieces of fish and chorizo as well as a piece of crusty bread to soak it up.
Ingredients:
1 kg of fresh ripe tomatoes
5 cloves of garlic
3 tablespoons organic olive oil
A touch of sugar
Salt and pepper
500 g of fresh cod
250 ml / 1 cup of fish stock
2 onions, peeled and sliced up
350 g of quality Spanish chorizo
1) De-skin and cut your tomatoes if making use of fresh ones. Peel and grind two cloves of garlic and then heat just two tablespoons of olive oil in a heavy based pan.
2) Cook and sweat the garlic within the olive oil on a very low heat for one or two minutes, at that time add in the chopped up tomatoes with a flavoring of salt and pepper with a pinch of sugar. Cook your tomatoes using a low heat for about an hour or so right up until they become a thick sauce.
3) Prepare the fish, doing away with any skin and bones and then slicing it into chunks. Chop the chorizo into bite-sized cuts or even chunks and then chop the remaining 3 cloves of garlic finely.
4) Heat just one tablespoon of olive oil in any frying pan and include the chorizo, cooking it for a few moments. Add the onions and sliced up garlic to the chorizo and cook lightly up to the point the onion begins to soften.
5) Heat up the fish stock. As soon as the tomato has finished cooking, put in the ingredients of the chorizo pan and the fish stock. Cook over a medium temperature for approximately fifteen minutes or so.
6) Add the pieces of cod to the pan and then cook for around another 5 minutes so that the fish is cooked through.
7) Sample the stew for flavoring. Serve in bowls with chunks of bread to mop up all of the juices. 

Tortilla De Patatas Recipe


The Tortilla or Spanish omelet is an ancestral and typical recipe from Spain. This dish is always tasty: warm in winter or fresh out of the fridge for a snack outdoors in summer. Its available to anyone, as it is very easy to cook and does not require much time: in 20 to 30 minutes it is ready to serve.
The dish does not require much work or much expense: potatoes, eggs, onion, garlic, salt and olive oil is all you need to surprise your guests. We can experiment with a wide variety of elements to make our tortilla unique.
The Tortilla is among the ten favorite dishes of the Spaniards; it is present on the Spanish tables since the eighteenth century and is one of the most requested dishes by foreigners in Spain.
The secret of a good Spanish Tortilla is to use good potatoes, fresh eggs and good quality olive oil. But one thing is certain: None will be equal. And there is no secret, just doing it with love.
Ingredients for tortilla de patatas
We estimate for each person the following amounts for the typical tortilla:
  • 100 to 150 grams of potatoes
  • 1 egg and a half (It depends in how you like the tortilla)
  • 50 grams of onion (and a clove of garlic who likes)
  • Salt to taste
  • Olive oil
Preparation:
  1. Peel and clean the potatoes in the moment when you are going to fry them, because if they are peeled in advance, they will become black. Cut potatoes and onion into thin layers.
  2. Put plenty of oil into a frying pan, heat well and add potatoes and onion; fry until the potatoes starts to soften.
  3. Once soft, take potatoes and onion out of the pan, drain the oil.
  4. Beat eggs and add the above preparation and mix well.
  5. We put a couple of tablespoons of oil in the pan and when hot, we move it so that the oil is distributed throughout it, including walls.
  6. Incorporate the preparation of potatoes, onions and eggs. The fire should not be very strong, but strong enough for the Tortilla to thicken.
  7. After a couple of minutes it is time to turn it around. To flip a tortilla is not difficult; it only requires a certain skill. We use a plate of the same or larger diameter than the pan. We put it on top and hop! turn.
  8. Slowly put the tortilla into the pan again and let it thicken on the other side. 

Chicken Curry


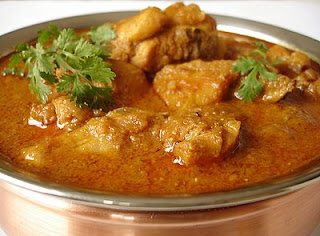
If you are searching for traditional Indian chicken curry, then I must say that you are on the correct page. Chicken curry is quite a popular dish as it has different versions and recipes depending on the regions and country. Everyone has their own unique style of making chicken curry.
Most of us believe that it takes lot of time and patience to make. But this article will guide you and show you how simple it is to make.
The major ingredients required to make the dish are: 12 skinless, boneless chicken breast halves- cut into strips, ½ cup vegetable oil, 4 large chopped onions, curry powder along with salt to taste.
Instructions:
Heat the oil in a large pan on medium heat. To the heated oil, saute the onions until golden brown. Stir in the curry powder and salt. Add the chicken breasts when all the ingredients are mixed properly. You can add little water if desired. Simmer the chicken covered on low heat for 45-50 minutes till the chicken is fully cooked.
Remove the cover and cook for an additional 15 minutes. Garnish with coriander leaves.
For a more flavored taste, you can marinate the chicken for few hours before you cook chicken. For marination, you can take the chicken breasts in a bowl and add ginger garlic paste, turmeric powder, chili powder, salt plus little yogurt. Mix them all well and leave for at least 2 hours.
When the curry along with chicken is fully cooked, you can serve over hot cooked rice with some mango chutney, if desired.
 

Spicy Crock Pot Recipes


The crock pot is great for cooking authentic Mexican food recipes, especially spicy ones. This is because slow cooking brings out the flavors of every ingredient and makes meals taste incredible. When you are using chilies and strong flavored ingredients to make traditional Mexican foods, you will want the flavors to develop and combine, because the finished dish will taste amazing.
Why Make Mexican Food in the Crock Pot
Slow cookers are great for cooking nearly any type of cuisine and this kind of cooking is especially suited to Mexican dishes. There are some cuts of meat, which are used in Mexican cooking but are quite tough. Skirt steak is a good example. This is delicious as a taco filling or stew ingredient but it needs to be cooked slowly for a long time, making it ideal for the crockpot.
There are lots of Mexican dishes that you can make in the crockpot, including meatballs, chili con carne, Mexican casseroles, soups, and dips. If you plan to be out all day but you want to get home to a delicious dinner, a crockpot will make your life so much easier because you can add the ingredients in the morning, leave it to cook and get home to something, which is ready to serve.
One of Easiest Mexican Slow Cooker Recipes Ever
For a quick and easy Mexican supper, simply add half a pound of browned hamburger meat, two cans of mushrooms soup, a can of taco sauce, a can of spicy enchilada sauce and a drained, small can of chopped green chilies to your crock pot and warm the mixture through for a couple of hours. Serve with cheese-flavored Doritos or corn chips.
You can sprinkle some grated Mexican blend cheese or cheddar over it if you like. Since all the ingredients for this recipe are canned, except for the hamburger meat, you can stock up on the ingredients if you enjoy this dish and make it whenever you fancy. The longer you cook it for, the stronger the flavors become but the ingredients simply need to be heated through so a couple of hours on "high" is fine. If you are going out, cook it on "low" but give it twice the time.
How to Make Mexican Crockpot Pork Roast
Another great recipe is to cook a pork roast in the slow cooker on "low" for eight hours or until it is very tender. Transfer it to a glass baking dish. Combine two cups of the broth from the roast with a couple of tablespoons of chili powder, a tablespoon of flour and some salt and pepper. Pour this mixture over the pork roast and bake it at 350 degrees F for ten minutes.
This is a fantastic recipe and pork roast will be really tender and flavorful from the slow cooking. The chili powder livens it up. You can serve this crockpot pork roast with anything you want but it goes well with mashed potatoes or French fries. This is a great meal to cook if you will be out all day or very busy, because it cooks itself for eight hours and then you just have to bake it for ten minutes to crisp it up before serving it. 

A Spicy and Hot Indian Recipe For Fish


This Fish Cutlet recipe is very easy to make.
It can be served as an appetizer, snack or a side dish.
It is good to include an oily fish in our diets at least thrice a week. So if you want you can use an oily fish or a white fleshy fish for this recipe.
Make the cutlets as hot as you desire. The idea is to balance all the flavors.
To make these cutlets you will need
  • 500 g fish steak (oily or white fish)
  • 300 g of potatoes (approximately)
  • 2 medium Onions (Chopped finely)
  • 3-4 green Chilies (chopped finely)
  • 1 cup fresh Coriander (chopped finely)
  • 2 Tbsp of Ginger-Garlic paste
  • Salt to taste
  • 1/2 Tsp red Chili powder
  • 2 Tsp Coriander powder
  • 1 Tsp Roasted Cumin powder
  • 1/2 Tsp Garam masala (optional)
  • 3-4 Garlic cloves, 1 inch ginger, 7-8 peppercorns and 1 tsp fennel seeds
  • Water
  • 1 egg (lightly beaten with a pinch of salt)
  • Bread crumbs
  • Oil for frying
To boil the fish, place the fish in a saucepan and cover it up with water (just enough to cover the fish). Pound the garlic cloves and ginger knob and add it in the water, along with the peppercorns and fennel seeds. Bring it to a boil and cover and simmer for 5 minutes or until the fish is done. Let it cool down.
Meanwhile boil the potatoes (in a pressure cooker or as you please). Grate or mash.
Also keep the beaten egg in a bowl and bread crumbs in a flat plate.
Remove the fish from the water, clean the bones and put all the flesh in a bowl. Add the mashed potatoes, chopped onions, chilies, coriander leaves, ginger-garlic paste, salt, lime juice and the rest of the dry powders.
Get your hands dirty. Mash and mix well. Sneak a taste and make adjustments if any.
Make the cutlets by shaping as desired (round or oval). Shape into small balls and place in between your palms and press gently, to flatten them a little.
Take each cutlet, dip it in egg and immediately roll it on all sides in the bread crumbs. Place all on a tray and once all cutlets are done, cover up with a cling wrap and put in the refrigerator for at least an hour. This helps the bread crumbs to set well on the cutlets.
Heat the oil for frying in a deep pan or kadai, and deep fry the cutlets in batches of 3-4 on a low to medium heat. When evenly brown on all sides, take out with a slotted spoon and drain on kitchen paper.
Serve with a dip or sauce of your choice.
Tips:
Always fry just one cutlet first, to check if the temperature of oil is ok. This way you lose just one if something goes wrong.
Make lots at one time and store in the freezer for up to a month. This saves a lot of time. Defrost and reheat under a hot grill or on a griddle on the stove. Do not heat in the microwave.
When you put the cutlets in the oil for frying, avoid turning them immediately, lest they might break. Wait for a minute or so and then turn them over. Keep turning occasionally to get an even brown color.
You can strain the water in which the fish was boiled as a mild and quick fish stock,to make a soup or sauce. 

Indian Style (Egg) French Toast Recipe


French Toast is an easy and quick snacks that tastes delicious (of course it's delicious, it's fried!). This can be a heavy breakfast and if you eat too many in the evening can serve as dinner as well. You can make this item even more distinctive by adding chat masala / pepper / amchur (grounded mango powder) /etc.
Ingredients
  • 1 small size onion
  • 2-3 green chili
  • 1 inch ginger
  • 1/2 teaspoon black pepper
  • 2 eggs
  • 4 bread slices
  • Vegetable oil
  • Salt
Preparation time: 5 mins
Cooking time: 10 mins
Serves: 2
Steps
1. Chop 1 small size onion, 2-3 green chili, 1 inch ginger and put it in a bowl.
2. Put salt to taste, 1/2 teaspoon black pepper into the bowl (step 1) and mix well.
3. In another bowl break 2 eggs and put it into the bowl and beat the eggs properly.
4. Put all the contents of (step 1 & 2) into the bowl (step 3) and mix well.
5. Take a non-stick pan heat 2 teaspoon of vegetable oil and put 4 bread slices into the tawa (shallow frying pan).
6. Put the mixed content (step 4) over on one side of bread slices and spread them with spoon and put that side upside down on the non-stick pan and fry till the one side is semi-cooked. While it is getting cooked, put another layer of mixture (step 4) on the top side and spread with spoon.
7. Then turn the bread upside down and semi-cook the other side as well.
8. Finally keep on flipping the sides of the bread till both sides are fully cooked, brown and crispy (up to your choice of the amount of crispness).
Garnish with black salt powder.
French Toast is ready to serve hot with tomato sauce for breakfast or evening snacks. You can also serve this with grated cucumber with lemon, salt and pepper for added coolness. 

Bread Koftas in Pumpkin Curry As Indian Recipe


This pumpkin and bread kofta curry is very yummy Indian vegetarian dish with a little new ingredient added to it. It is the bread. i would say this would be one of the creative way to finish a day or two old bread. "Koftas" means balls fried in oil. Here I have koftas with bread and a few other ingredients. I have used Bottle gourd or the white pumpkin familiarly known in India. If you dont get it you can even use the red pumpkin to prepare this curry. The only little difference in taste is that it would give a light sweeter taste.
I tried this recipe without the use of onions. As now a days the onions have become dearer it is time to think with something that tastes great and at the same time it has no onions. But onion can also be used if available in abundance.
This is a very nutritious dish and when eaten with rice becomes a complete dish in itself.
Bread koftas in pumpkin curry
Ingredients
For the Koftas
Bread slices 5-6
Fresh curds ½ cup
Plainflour (maida) 3 level tbs
Chopped coriander 1tbs
Green chillies, chopped 4
Soda bi-carb 2 pinches
Salt to taste
Oil for frying
For the pumpkin curry
White pumpkin (lauki) 250gms
Tomatoes 2 large
Cumin seeds 1tsp
Chilli powder 2tsp
Coriander - Cumin seed (dhania-jeera)powder 1tbs
Turmeric powder 1/4tsp
Garam masala 1tsp
Fresh curds 2 cup
Green peas ½ cup
Boiled and fried small potatoes 1 cup
Ghee 3tbs
salt to taste
Method For the koftas
Remove the crust from the bread slices. Soak the bread in the curds for 20 minutes
Add the flour, coriander leaves, chillies, soda bi-card and salt. Mix thoroughly divide and roll into balls, deep fry in oil.
For the pumpkin curry
Peel the pumpkin and cut into big pieces,add one and a half cup of water and cook.
When cooked, blend in a liquidiser put the tomatoes in hot water for 10 minutes grate into a puree.
Heat the ghee and fry the cumin seeds until they crackle.
Add the chilli powder, coriander-Cumin seed powder, turmeric powder and garam masala and fry a few seconds.
Add the Curds, pumpkin mixture, tomato puree and half cup of water, cook for a few minutes.
Add the green peas, potatoes and salt to the mixture
Just before serving add the koftas to the curry and give one boil.
Garnish with Coriander leaves and serve hot with Roti or Rice 

Chile Rellenos


Chile Rellenos is a traditional Mexican dish that originated in Puebla. The term literally means stuffed chili and is typically made from fresh poblano peppers. In place of a poblano pepper, a Hatch green chili, pasilla, jalapeno chili pepper, Ahaheim, or ancho chili can be used. The dish is usually made by battering a skinless pepper and stuffing it with picadillo meat or cheese. The stuffed pepper is then covered with a red sauce. Picadillo meat can be made of diced pork, nuts, and raisins or seasoned with canella. The pepper is covered with corn masa flour or an egg batter before frying.
During Lent, beef, pork, and poultry are avoided by Catholics on Ash Wednesday, Holy Thursday, Fridays and Good Friday. Because of this, chile rellenos can be made stuffed with tuna, cheese, separated maize grains, other seeds, sliced vegetables or a mixture of all of these.
How To Roast, Peel And Seed Poblano Chiles
In order to prepare chile rellenos, the peppers need to be roasted, peeled, and seeded. In order to roast the peppers, place them on a broiler pan and place in oven. Broil peppers until the skins are charred or covered with black blisters. Be sure to turn them occasionally. Place chilies in resealable plastic bag and seal the bag. Let the chilies stand for 10 minutes. Remove from bag and remove peels. Be extra careful not to break the skins. To remove the seeds, make a vertical cut in each chili and remove the small cluster of seeds attached to the base of the chili.
Chiles Rellenos With Sweet Picadillo
This recipe uses poblano chilies which can usually be found in your grocery store. This recipe serves 6 people with a pepper each. The picadillo features a mixture of ground beef, raisins, and almonds. You can prepare these chile rellenos in advance, if needed, by preparing as directed and refrigerating up to 24 hours. When you get ready to serve, pop them in the oven covered for 20 minutes or until heated all the way through.
This dish can be topped with sour cream, shredded cheese, and pico de galo. Guacamole makes a great side for this delicious meal. Ground chicken, turkey, or pork can be substituted in place of ground beef. Low fat sour cream can be used in place of regular sour cream to cut down on calories and fat.
What You Need:
  • 1 ½ pound lean ground beef
  • 2 tablespoons zesty Italian salad dressing
  • 1 8-ounce can of tomato sauce
  • ½ cup toasted slivered almonds
  • ¼ cup raisins
  • 6 large roasted, peeled, seeded, and deveined poblano chilies
  • ½ cup sour cream
How To Make It:
Preheat oven to 350 degrees. In a large skillet, brown meat and salad dressing while draining if necessary.
Stir in tomato sauce and bring to a boil. Stir in nuts and raisins. Simmer on medium-low heat for 10 minutes or until there is not any liquid remaining. Stir occasionally.
Spoon meat mixture into chilies and place in a shallow baking dish. Cover dish with foil and bake for 10 minutes or until heated through.
Serve topped with sour cream.  

Mole Sauce Recreated


Anyone who has ever attempted to make a mole sauce probably gave it up as a bad idea. An authentic mole has around 17 ingredients, and is a long, drawn our process. That explains why it is rarely offered on restaurant menus.
A trip to the store will reveal some magical philtres such as Abuelita Chocolate and Doña Maria Mole Paste.
Mole is traditionally made with chocolate and cinnamon, in a savory blend of ground seeds and spices and oil. Doña Maria takes much of the work out, and makes a fairly good product, but for some reason, they have left out the chocolate.
A good fix is the addition of some Abuelita Chocolate. Mexican chocolate comes in a pressed block divided into 8 sections. It is infused with cinnamon, and is not overly sweet.
To dress up jarred Mole sauce, first, measure out the amount you need into a saucepan, then to that add chicken broth, four parts broth to one part paste according to the package directions. Add the broth slowly so it does not lump up. Once you have the base of the mole ready, grab a wedge (one section of the disk) of the Abuelita. There may be other brands on the market, but this is the most common. You can recognize it by the octagonal shaped package with a picture of someone's sweet smiling grandmother on the front. Grate the chocolate into the mole sauce. About a third of a wedge should be enough for two servings of mole.
Heat the sauce over low heat, stirring almost constantly. Once it is on a simmer, give a taste. If you want a more pronounced flavor, you can add another grating of chocolate. A pinch of extra cinnamon or even cardamom may be to your taste. Keep the sauce on a very low heat for at least 15 minutes.
Mole sauce was served for years over sliced turkey, the way Americans use gravy. It also goes very well on grilled chicken breast.
You can also make up the entire jar of sauce (one small jar of Doña Maria's makes 8 servings) and keep it in the fridge. It will keep a week once it is prepared. In the jar, opened, it can last for up to six months.
One good use for mole sauce is with stuffed chicken breasts. These are easy to prepare on a countertop grill like a George Foreman, or they can be cooked in the oven or on the stove.
Stuffed Chicken Breasts
What You Need:
  • Two large boneless, skinless chicken breasts
  • four ounces fresh goat cheese, softened to room temperature
  • 8 slices of thinly sliced cooked bacon, or 4 pieces of prosciutto
  • lemon pepper seasoning
  • grill spray, like Pam
How to Make It:
Cut the chicken breasts in half. Place one piece between two sheets of plastic wrap or inside a large plastic bag. Pound out with a mallet or the bottom of a pan until they are of uniform thinness, large and flat. Open the plastic. Sprinkle the chicken with lemon pepper seasoning. Put down two pieces of bacon or one of the prosciutto. You may need to trim the pork so it only takes up half of the surface of the chicken. Place one ounce of goat cheese in the center. Fold the pounded chicken in burrito fashion, folding the ends up, and then folding the sides over. Do not fold tightly, but do not leave any gaps if you can help it. Escaping cheese is not pretty.
Heat the grill, and cook the chicken bundles until done. You can check them with an instant read thermometer. 163° F is considered done for chicken. However, if you bring it to that temperature on the grill at one time, it will come out dry and tough. Instead, bring it up to between 145° and 150° F, and then allow it to rest for 15 minutes.
Serve with mole sauce and rice.